You’ve just purchased a new Mac and are excited about it, right? Still, there are so many things in Mac OS that are different when comparing to Windows, including the process of taking print screens. That is why having a look at how to print screen on a Mac could become a useful option.
Generally, the steps needed to be done when you need to take screenshots on your mac depend on the result you wish to obtain. Indeed, when it comes to taking print screens or, as they are also called “screengrabs”, you can either photo your entire screen or only part of your screen. Plus, you can capture just the image you need. Thus, the icon of any area of your screen can be saved.
Before going further, there are a bunch of tips, which you are recommended reading through.
The Key Mac Screenshot Tips Include:
Tip 1: Taking screenshots is not difficult at all. You do not need to insert an image into other programs to save it.
Tip 2: By default, screenshots in Mac OS X v10.6 and later are automatically saved as .png files on your desktop. So, should you need any other formats or once you wish the icon to be saved in other location of your Mac, you can open the file, which you will find on your Desktop under the name “Screen Shot date at time.png,” and save it the way you need.
Tip 3: Your screenshots can be opened with Preview or other image-editing programs.
Tip 4: To become even more artful in printing images, for instance, adding some other images on the same printout or arranging it within white space, you are recommended dragging the image in Photoshop or open it in any other similar app.
Tip 5: Be aware that there are programs that are made to play copy-protected videos, for instance DVD Player, which will not allow you to take a screenshot of the contents of their windows.
Anyway, as it was mentioned in the opening, when it comes to the process of taking screenshots, there are some ways to go. Everything depends on the needed results.
Thus, if you do need to take a screenshot, you can choose one of the following:
- Command-Shift-3.

By pressing this combination, you entire screen will be captured. You’ll hear a camera click sound, and that’s it. Your screenshot awaits for you on your Desktop. To share the screenshot with Preview, double click it
- Command-Shift-4.

By pressing this combination, you can take a screenshot of portion of your screen. Once you press this combination, you will see a crosshair pointer. Set it by selecting the area you wish.
By the way, we can reveal you some more secrets here:
- If you want to change the way the selection moves, hold Shift, Option, or Spacebar while dragging.
- Escape (esc), once pressed before you release the button, will cancel the command.
- Command-Shift-Control-4.
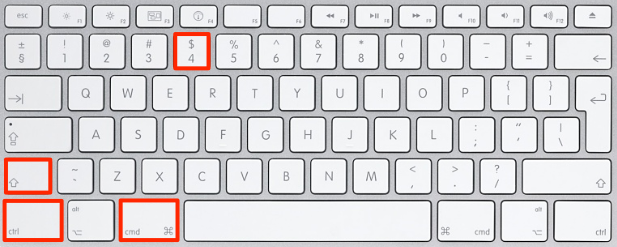
By pressing this combination, instead of a file on your desktop, you copy your screenshot to the Clipboard. If you wish, for instance, to send your screenshot, all you need to do in this case, is simply to specify where to send the photo and paste it.
- By means of a Grab app. This program lets you master some super options, which you can’t do simply by taking screenshots. Intrigued, right? As a matter of fact, there are cases when we need to have both hands on the keyboard or when to stage a screenshot; we have to wait for some moments. And we can do this using this wonderful app.
That is how:
- Find the Grab app. For this you can simply type In Spotlight: “Utilities”
- Find Capture.
- Choose Timed Screen. Right after that you’ll see a small window, telling that the countdown is going to start and in 10 seconds after this Grab will grab a screenshot. Hit Start Timer when you are ready.
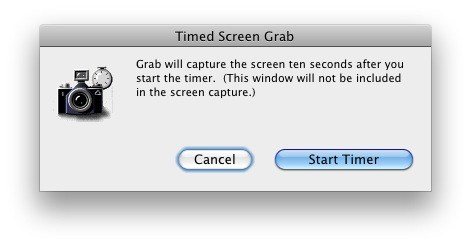
Once the time is out, Grab will snap a screenshot, and you’ll see the results. If you like the icon, all that you need to do is to save the screenshot. Once the pic is ready, close Grab.
So, after having a glance at all these How-Tos, now you can take advantage of the full suite of screenshot tools any modern Mac comes preloaded with.
P.S. Apart from using keyboard, you can also take screenshots by means of a Terminal. Wondering how?
Open Terminal and type:
screencapture -iW ~/Desktop/screen.jpg
And that’s it! By the way, it is a really useful way for those who write scripts and need to share them in an easy and fast way.