There are multiple reasons why Mac users might need to reboot the system to some of its factory defaults, including the following ones: sale, giveaway, virus, or whatever. That is why we have decided to show you a step-by-step guide on restoring your Mac or Apple computer to its default factory settings. In other words, your Mac will be reverted to an unblemished factory state, the same you have when you get the Mac for the first time.
However, before we proceed with the process of factory defaults restoring, you are recommended taking a closer look at these important issues.
- Make sure you have all your needed data saved in a flash device or in any cloud storage you are using.
- Make sure that you have Internet connection because you will need to download the latest copy of Mac OS X.
- Notice that you might want to access all your old files, therefore, it would be wise to make a copy of your internal hard drive to an external drive. By the way, there are many programs, for instance, Carbon Copy Cloner or SuperDuper, which will assist you with the cloning process.
- Quit FileVault ( of course, in case you were using it).
- Quit your iTunes store account. ( Don’t forget that you are also recommended logging out of all third-party apps connected to your Mac).
- Quit iCloud.
Once you’ve taken all the listed above issues into account, you can proceed with the process of reverting.
Anyway, to restore your Mac to its primary settings, you have to do the following:
- Hold Command and the R key during restart to restart your Mac in Recovery Mode.
- Press Disk Utility and then select Continue. Choose the main volume and then You will see Erase, press it.
- Go to Disk Utility, where you will need to select Quit Disk Utility.
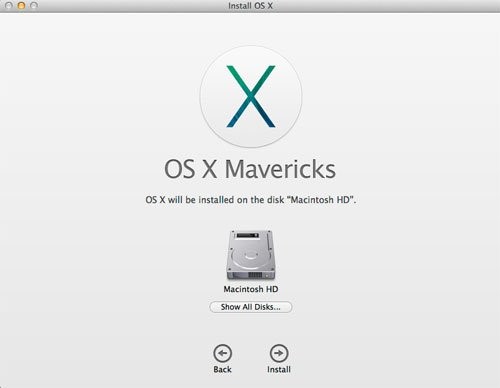
- Press Reinstall OS X
- Select Continue.
- Follow further instructions.
Once all the mentioned above is done, there are some more steps to be taken.
1. Make a copy of your hard drive
When it comes to resetting your MacBook to factory settings, it means that will need to delete all your data from your computer. However, notice that even when you transfer your data from to a new place, it would be wise to create a clone of your entire hard drive since you might need it soon. As it was mentioned somewhere in the opening, the easiest way to make a clone of your data is to use a special program, in particular, Carbon Copy Cloner or SuperDuper. It’s really fast and simple. Let’s see how to do this by means of Carbon Copy Cloner. All you need to do is:
- Choose your main hard drive in the Source
- Find Destination and select your external hard drive
Submit Clone.
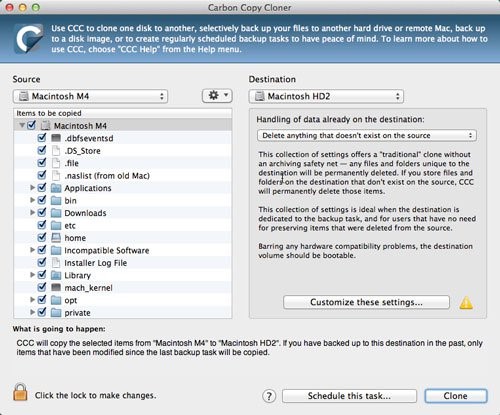
Remember: booting from the cloned external hard drive is essential. To make sure that it works, you will need to reset your Mac. So, you will need to hold down Option during the entire booting process. Choose the external drive with the help of the arrow keys on your Mac, then tap Enter. This cloned drive can be re-cloned back to the main drive if you decide to restore your Mac, or it can be used to access all the original files from your computer after you have wiped the internal hard drive.
Notice: Being loaded with Mac OS X, Carbon Copy Cloner is not free anymore, so, to use it, you will have to pay.
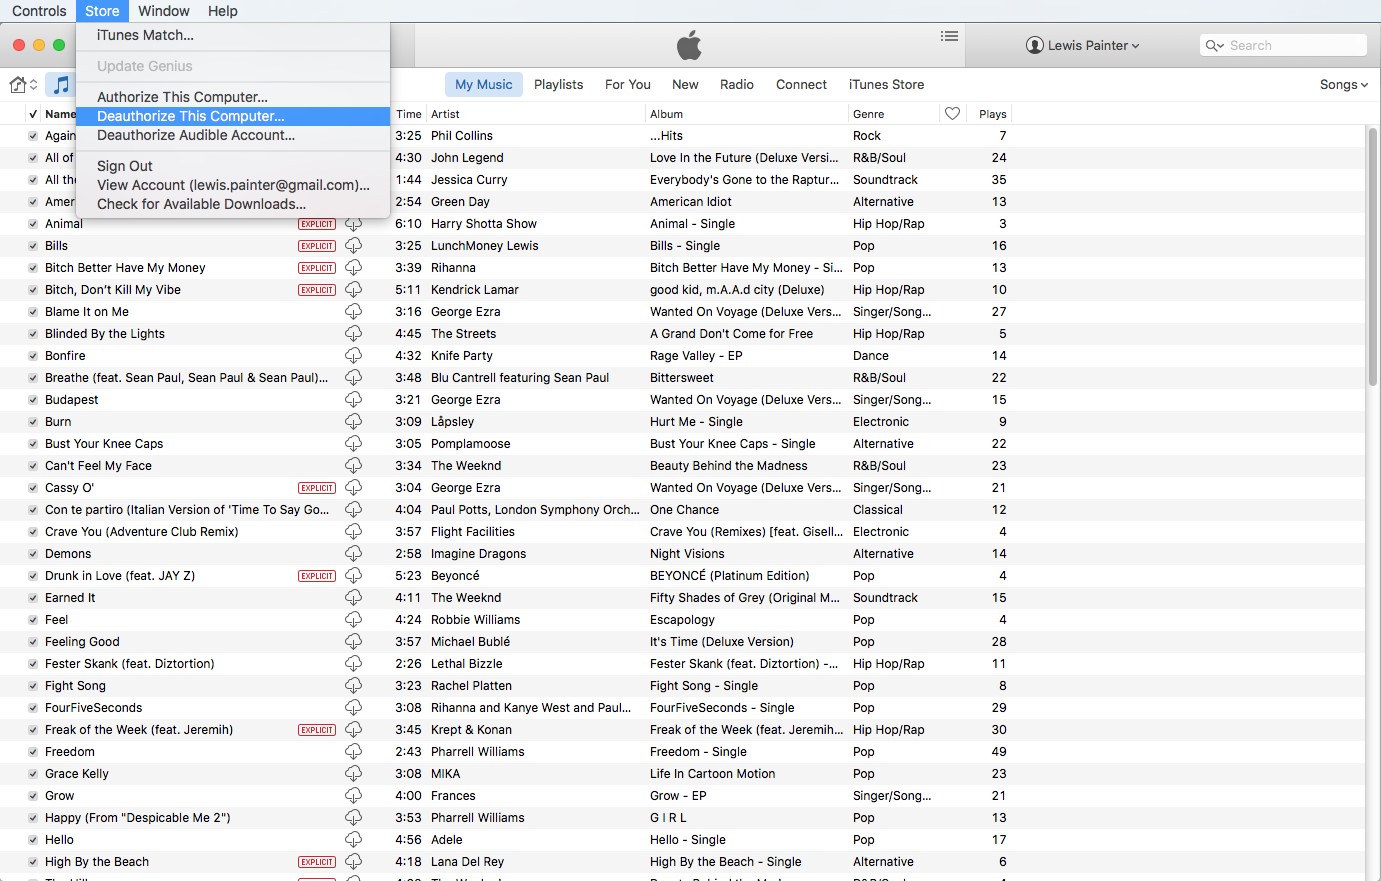
2. Unlink your Mac with iTunes
Unlink your iTunes account and your computer. You do not need to give your iTunes account to another person as, in general, Apple allows you to use up to five Macs to play music and movies that are associated with your iTunes account.
To deauthorize, go to iTunes, find and select Store. In the drop-down list you will see “De-authorise This Computer”, select it. Then you will be asked to type your Apple ID and password. Finally, tap De-authorise.
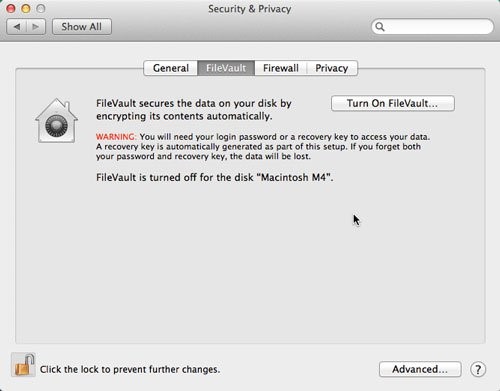
3. Disable FileVault
Before proceeding, turn FileVault off because as you are to delete your files, you don’t need your data being encrypted anymore.
To disable FileVault, you are to follow these simple steps:
- Open System preferences
- Find and select Security & Privacy
- Find and select FileVault.
- Make sure that FileVault is turned off the for the disc. Otherwise, you need to press the padlock icon in the bottom left and then you will be asked to enter your password. Finally, click Unlock.
Press Turn Off FileVault.
4. Deactivate iCloud
Deactivating iCloud is fast and easy. Find iCloud in the Open System Preferences and then press Sign Out Now. Tap Delete From Mac on every occurring popup to get rid of your data.

5. Restart the Mac in Recovery Mode
Be aware: Internet connection is required! Select Apple and then Restart. Hold down Command + R and you will see the Recovery Mode Utilities window.
6. Erase all data on a disk
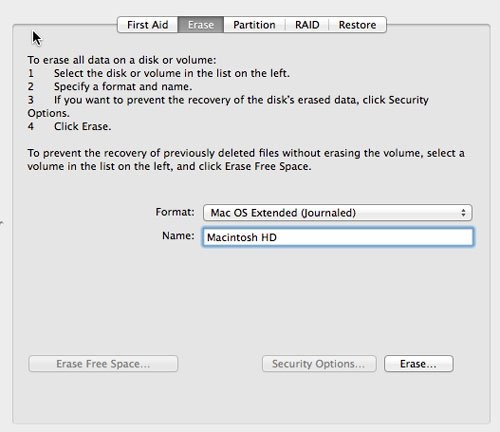
- Choose Disk Utility,
- Tap Continue.
- Specify the main Startup Volume (in most cases, it is simply called Macintosh HD).
- Tap Unmount.
- Go to the Erase tab
- Click Erase.
Be aware: you are going to delete all data on the hard drive. Therefore, if you are not sure that you want this or once you haven’t cloned the drive, don’t do this.
- Once the data gets deleted, go to Disk Utility and tap Quit Disk Utility.
That’s it!
7. Reinstall Mac OS X
Press Reinstall OS X and follow the further instructions. A blank copy of Mac OS X Yosemite will be downloaded and installed on the Mac.
Important: We suggest that you should not put your Apple ID and password during setup.